

Live Events
Overview
Live Events in Backstage enable you to create, schedule, and manage real-time streaming content for your viewers across mobile, tablet, and TV platforms. This feature provides comprehensive tools for setting up live broadcasts, managing stream parameters, and organizing live content within your application's content structure.
Live Events integrate seamlessly with your existing content management workflow, allowing you to schedule broadcasts in advance, configure technical streaming parameters, and ensure your live content appears properly within playlists and feeds. The system handles both the technical streaming infrastructure and the content presentation aspects of live broadcasting.
Creating a Live Event
How to Create a Live Event:
Navigate to the "Live Events" tab in the left sidebar of Backstage.
Click "Add New" in the top right corner of the screen.
A modal will appear with two main sections: Stream Details and Media Asset Details.
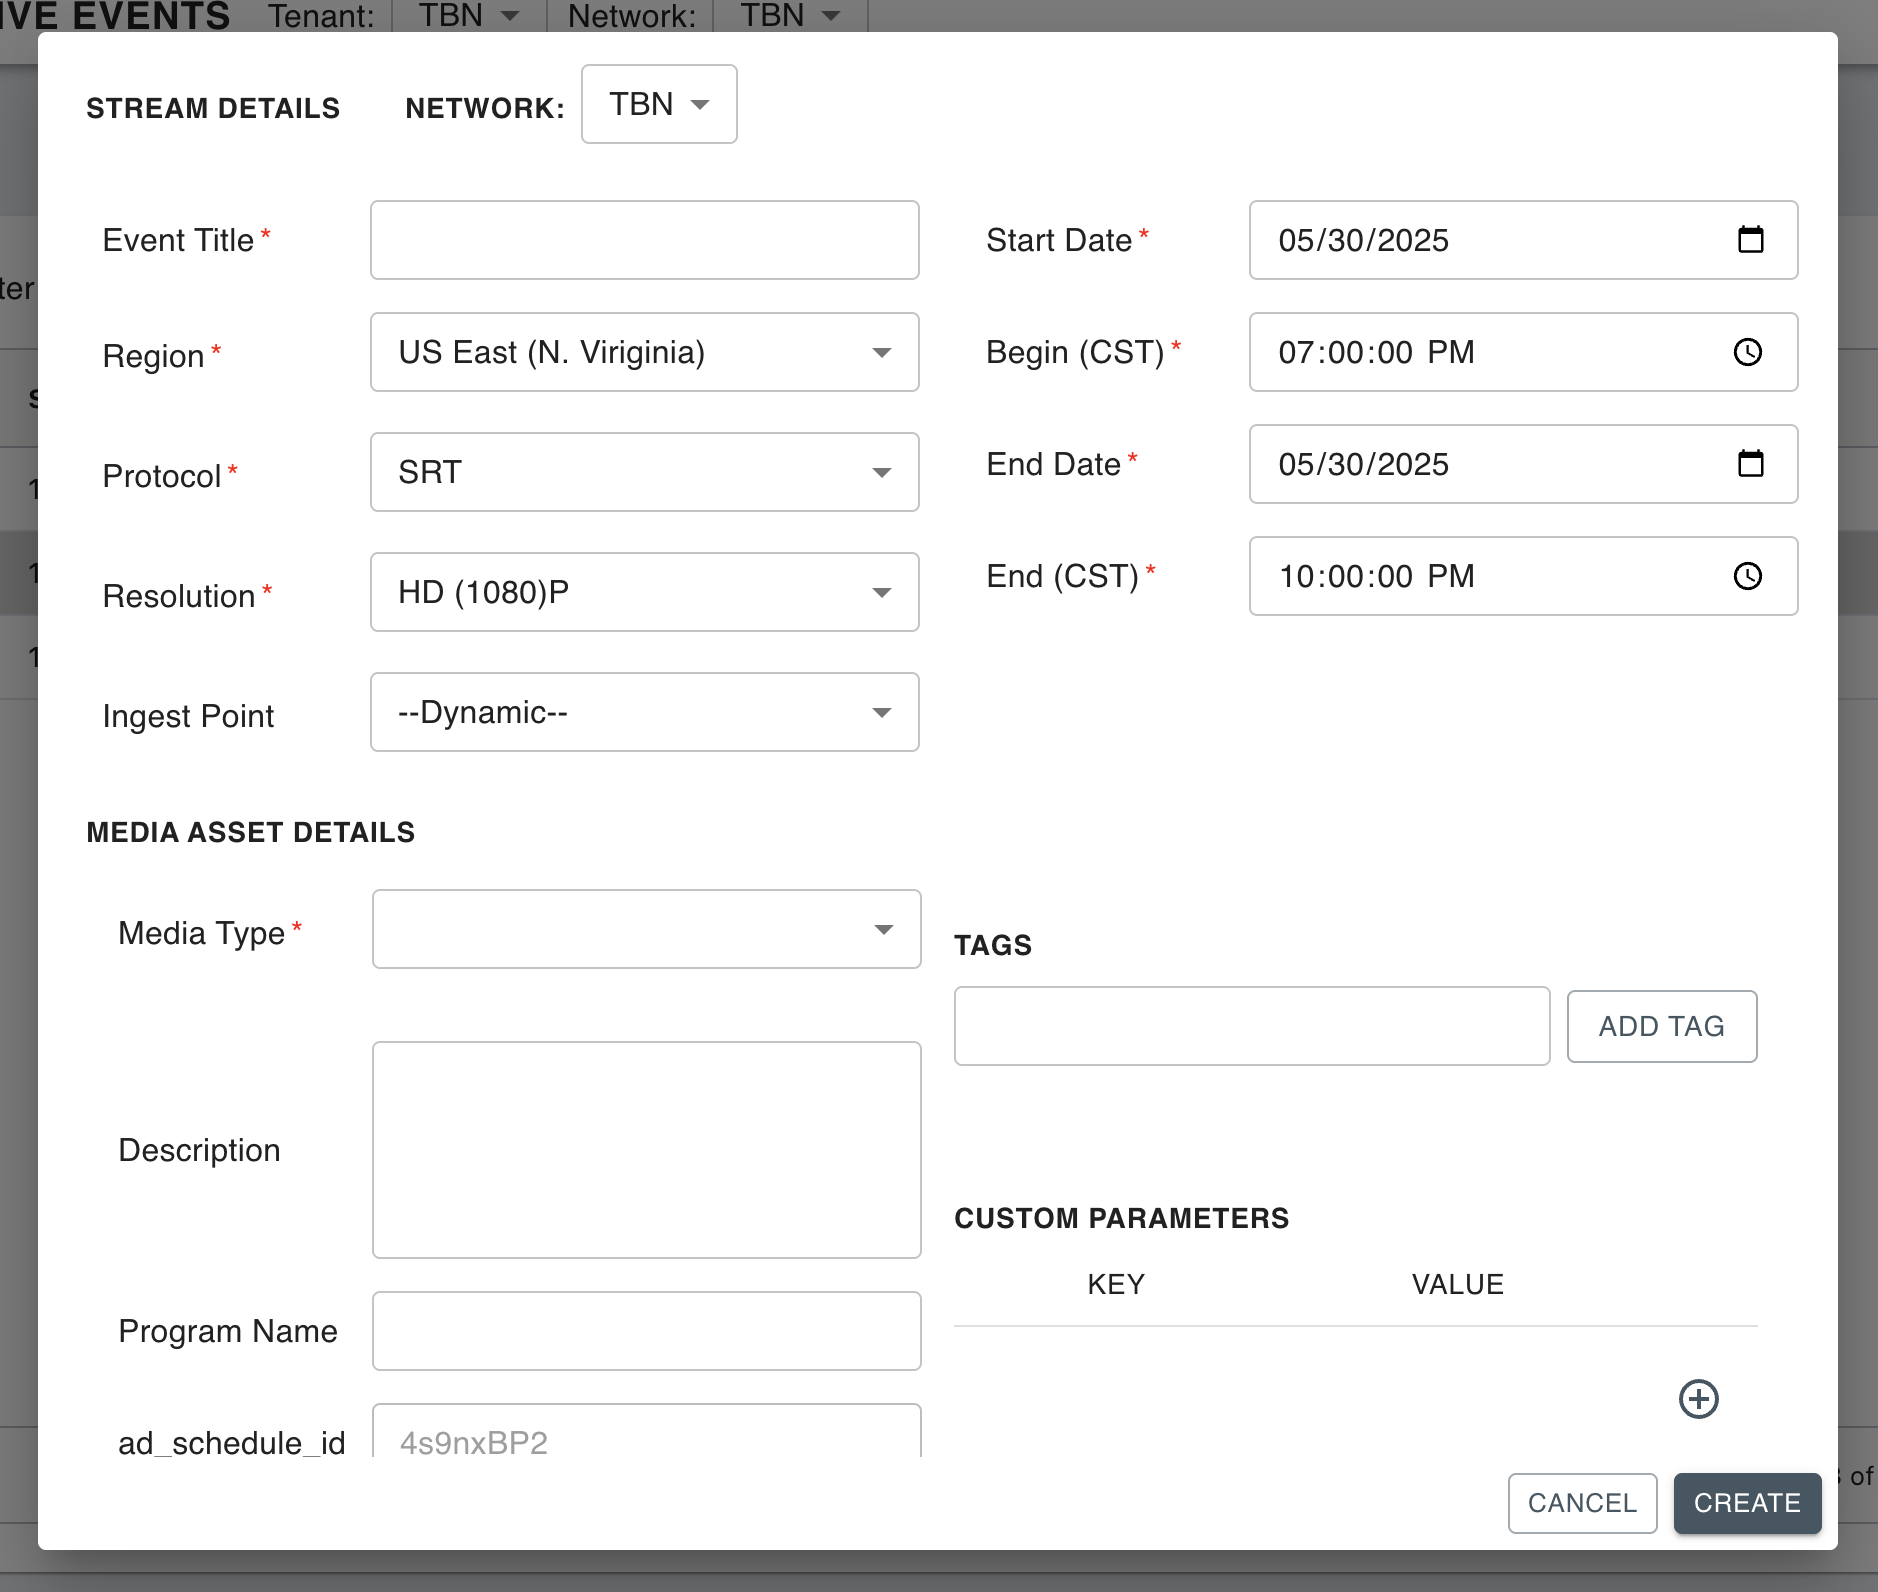
Complete the Stream Details section:
Event Title: Enter the title for the event as it will appear to viewers
Region: Select your preferred streaming region (e.g., US East (N. Virginia))
Protocol: Choose the streaming protocol (e.g., SRT)
Resolution: Select the broadcast quality (e.g., HD (1080)P)
Ingest Point: Select the ingest point that will be sent to your encoder to receive the signal
Select Dynamic if no static ingest point is needed
Start Date: Set the date when the event begins
Begin Time: Set the start time for the event (in Central Time)
End Date: Set the date when the event ends
End Time: Set the end time for the event (in Central Time)
Complete the Media Asset Details section:
Media Type: Select "Live Event"
Description: Enter a public-facing description of the event
Program Name: Enter the title for the event as it will appear to viewers
Tags: Add appropriate tags for content organization and playlist routing
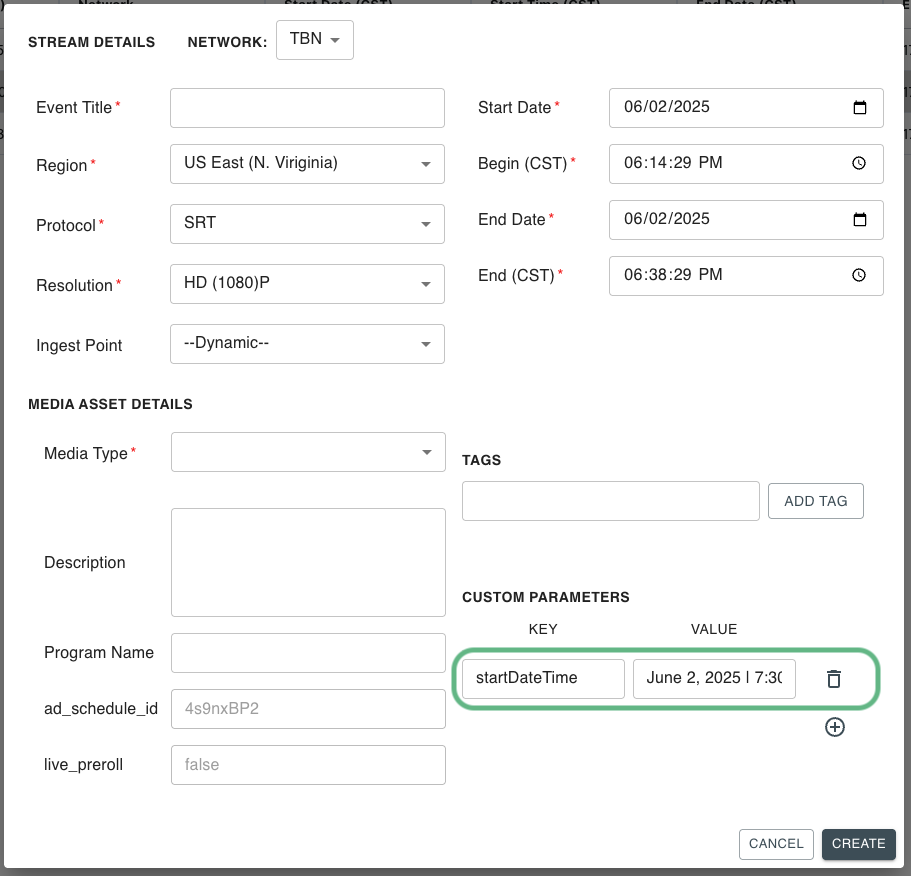
Custom Parameters: Configure any additional metadata or parameters needed for the event
For example, the following parameter and value would show a badge displaying the Date and Start Time of the Live Event:
startDateTime
Month Day, Year | StartTime (ET)
Click the "Create" button to generate your live event.
Backstage will begin processing the event. Once the status shows "Scheduled," you can proceed to edit the event if necessary.
Editing a Live Event
Once your live event has been created, you can modify various aspects of the event and its associated media.
Accessing Event Details
Navigate to the Live Events page and locate your event.
Click the "Edit" button for the specific live event.
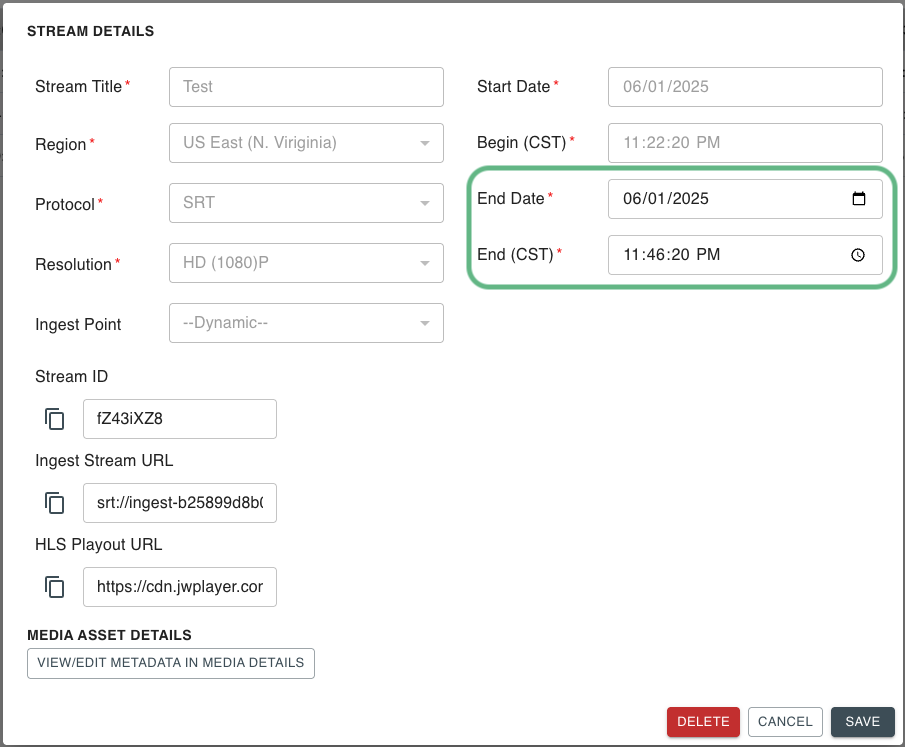
The edit modal will display important technical information:
Stream ID: The unique Media ID for easy searching in the Media Library
Ingest Stream URL: The URL associated with your selected ingest point
HLS Playout URL: A preview m3u8 URL you can use to test the stream
Modifying Stream Configuration
Important Note: You can change the ingest point at any time from this screen. However, you cannot have two events sending to the same ingest point simultaneously.
Editing Event Schedule
To modify the timing of your live event:
Navigate to the existing event on the Live Events page.
Access the event's scheduling settings.
Update the start time, end time, or date as required.
NOTE: Start Date and Time are locked 15 minutes prior to the start of the Stream
Editing Media Information

In the edit modal, click the "View/Edit Media" button in the bottom left corner.
From this interface, you can modify:
Event title and description
Thumbnail images and graphics
Tags and custom parameters
Additional metadata fields
Click "Save & Publish" to apply your changes to the live event.
Geo-Blocking Configuration
Backstage supports geographic content restrictions through a geo-allow system rather than geo-blocking specific countries. This means you specify which countries are permitted to access the content.
Setting Up Geographic Restrictions
In the Media Asset Details section or when editing an existing event, navigate to the Custom Parameters.
Add a new custom parameter with the following configuration:
Key:
geo_allowValue: Country ISO codes separated by commas
Geographic Restriction Examples
geo_allow
US,CA,AU
Content will only be accessible in United States, Canada, and Australia
geo_allow
US
Content will only be accessible in United States
geo_allow
US,CA,MX,GB,DE,FR
Content will be accessible in North America and select European countries
Note: Use standard ISO country codes for accurate geographic targeting. The geo-allow parameter supports multiple countries in a single configuration.
Quality Assurance and Feed Verification
After scheduling your live events, it's important to verify that all events are properly configured and will appear correctly in your application.
Checking Event Visibility
Navigate to the "Playlists" tab in the left sidebar.
Search for your Live & Upcoming Events playlist by name or Media ID.
Search Tip: You must search for the exact playlist title or Media ID to get accurate results.
In the Playlist Video Preview, review all visible events and ensure:
All events have appropriate thumbnails
Event titles are properly formatted and approved
No events are missing required metadata
If you identify events that should not be visible to users:
Right-click on the event thumbnail
Select "Open in New Tab"
Add an "inActive" tag to the event
Save and Publish the changes
This process ensures that only properly prepared and approved live events are visible to your users.
Technical Considerations
Ingest Point Management
Each ingest point can only handle one live stream at a time
Plan your event schedule to avoid conflicts between multiple events
The ingest point can be changed up until the event begins, but consider encoder setup time
NOTE: To create or adjust static ingest points, please contact your Backstage Rep for assistance
Time Zone Standards
All event scheduling uses Central Time (CT) as the standard
Ensure you accounts for time zone differences when scheduling events
The 15-minute editing restriction applies to Central Time
Stream Quality Settings
Different resolution options provide varying levels of quality and bandwidth requirements:
HD (1080)P: High-definition streaming for premium content
Other resolution options may be available based on your specific configuration
Choose the appropriate resolution based on your content type, audience expectations, and technical infrastructure capabilities.
Last updated